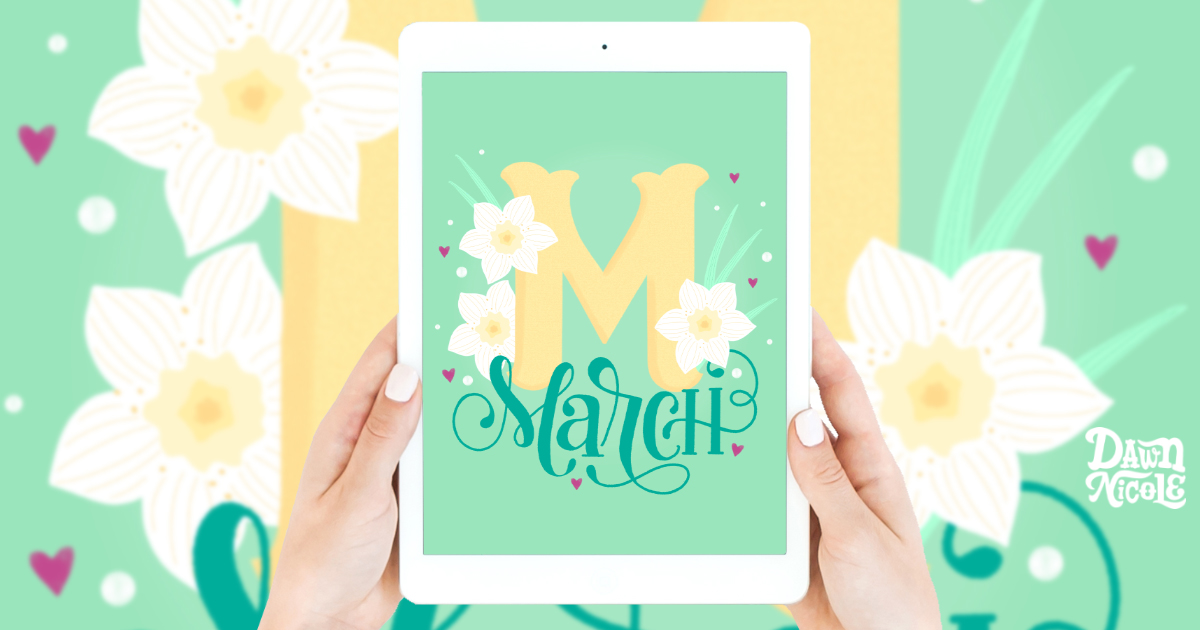
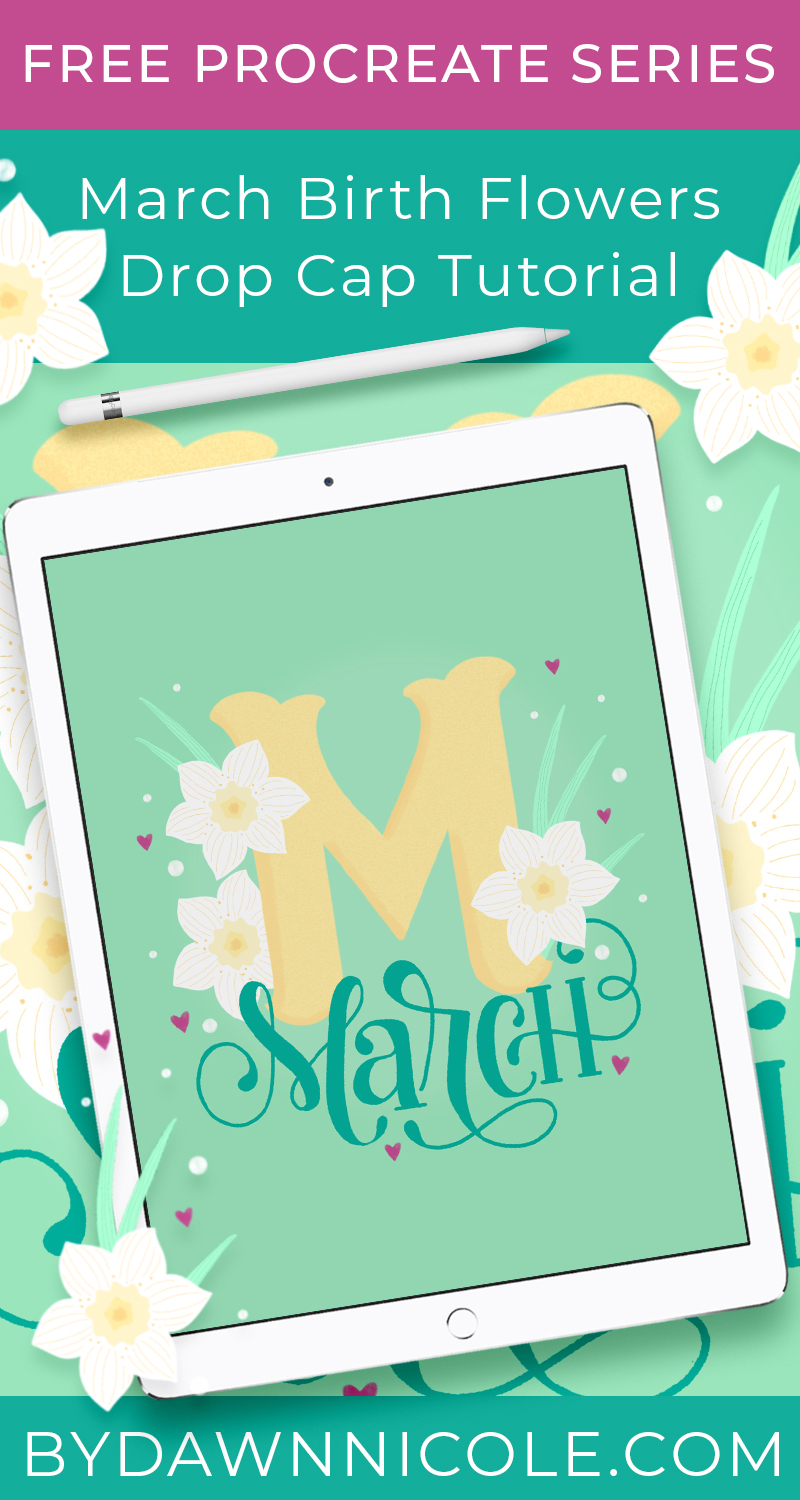
March Birth Flowers Drop Cap Tutorial. Follow along with my video lesson to create this Daffodil drop cap in Procreate.
March Birth Flowers Drop Cap Tutorial
If you’re new to this year-long series, I recommend completing the previous lessons and then returning to this one, as some lessons build on things taught in prior tutorials.
The birth flower for this month is the Daffodil, and it’s a super easy one to draw!
What You’ll Need to Follow Along
- iPad and Apple Pencil
- Procreate App
- Daffodil Garden Color Palette (download it below)
- A Variety of Procreate Brushes. I created this Drop Cap and artwork using brushes from my Procreate Brush Kits.
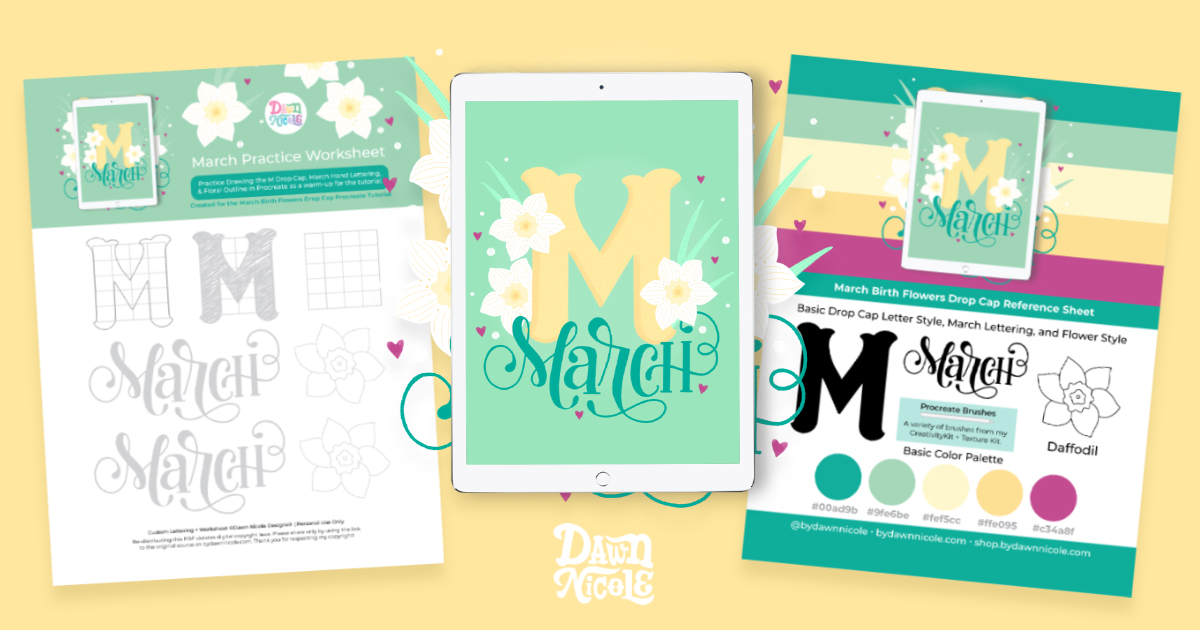
- Drop Cap Reference Sheet. I created a worksheet you can print and reference as we work through the step together.
- Practice Worksheet. Use this as a warm-up exercise or to trace for the tutorial itself. It includes the M dropcap, March hand lettering, and Daffodil outline.
Click the buttons below to download the freebies!
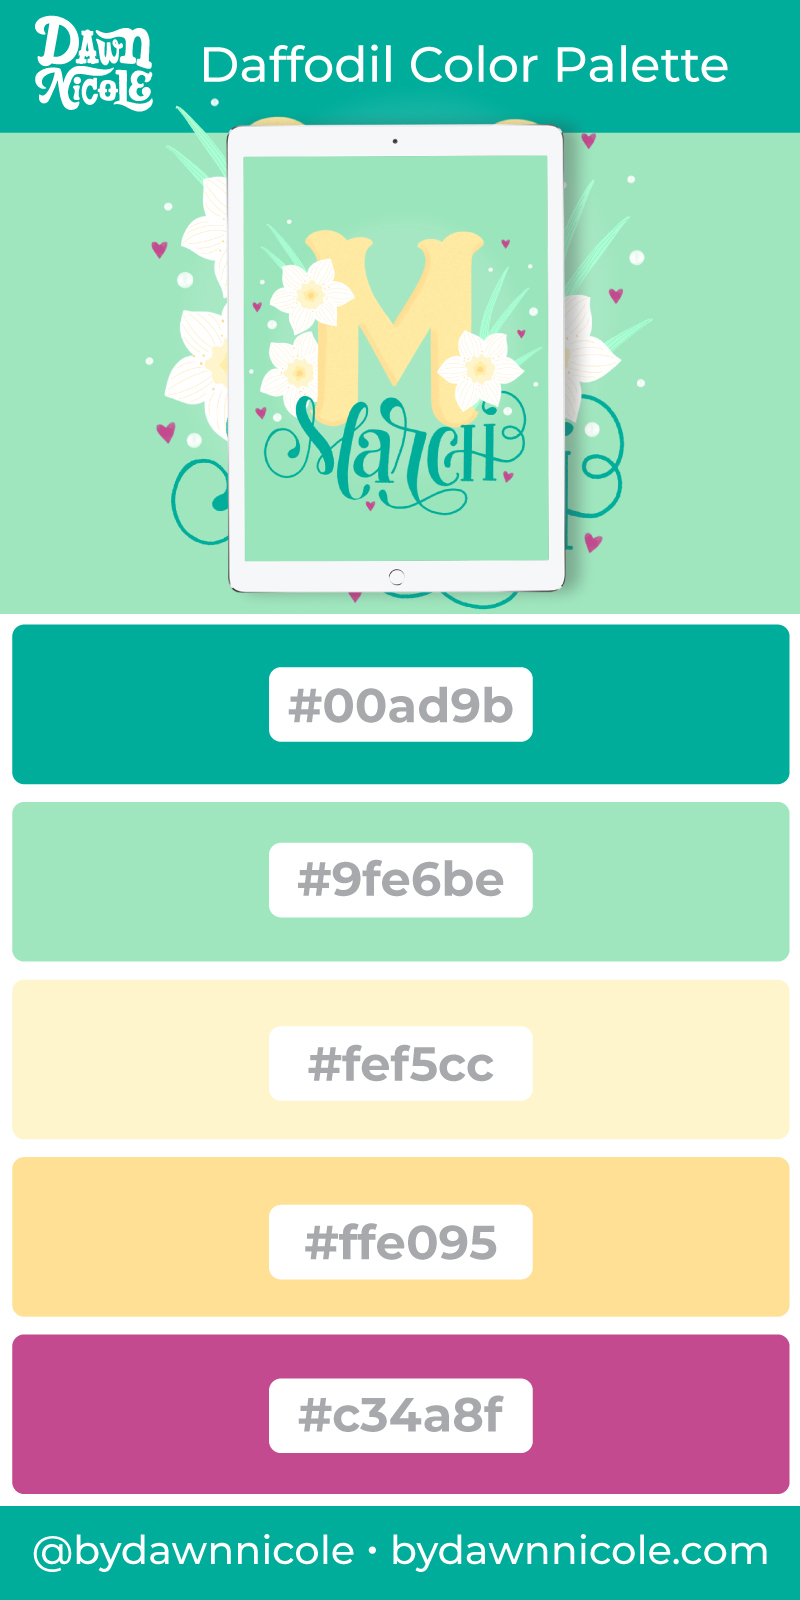
the Daffodil Garden Color Palette
- Right-click or screenshot the photo above to save the color palette.
- Import the photo into Procreate and use the Color Selection tool to save the colors to a new palette. (Google how to do this, if needed).
- Use the color palette in design programs such as Photoshop and Illustrator.
- Match your physical art supplies (markers, colored pencils, watercolors, etc.) to the palette and work the old-school way!
The BASIC STEPS
Here are the super basic steps for this artwork. I’ll walk you through them in more detail in the video below.
- Change your background color.
- Draw your letter “M” on a new layer. I used the Quinn Style Lettering taught in this workbook.
- Use a new layer with a clipping mask to add some shading to the M.
- On another new layer, draw and color the daffodil. Duplicate the layer to create three flowers. Position them as desired, rotating and adjusting the sizes, so they look like different flowers (even though we’re using the exact same one).
- Add another layer and drag it to the bottom. Draw your leaves on this layer. Color and add details.
- Add the “March” lettering on its own layer.
- Finally, add the heart and dots using stamps (again, on their own layer).
Using a lot of layers makes it easier to edit and adjust your artwork when you need to!
Watch the MARCH Birth Flowers Drop Cap Tutorial Video Lesson
Watch this roughly 22-minute video lesson below!
VIDEO OUTLINE
In case you want to skip or re-watch any portions of the tutorial, here are the timestamps for each section.
- 00:00 Intro
- 00:13 Welcome + Overview
- 01:50 Tips for Drawing the M Drop Cap
- 05:10 Adding color, texture, and shading to your Drop Cap
- 08:20 Creating the Daffodil Florals
- 10:48 Adding Details + Duplicating your Daffodils
- 14:14 Adding the Daffodil Leaves
- 16:43 Tips for the March Hand-Lettering
- 17:30 Using Stamps for the Dots and Hearts
- 20:35 Notes about the March Lettering Style
- 22:10 Outro

March Birth Flowers Drop Cap Tutorial
I hope you enjoyed this month’s lesson. Stay tuned for next month’s Floral Drop Cap Tutorial!
LET’S CONNECT
Facebook // Pinterest // Instagram // Shop


