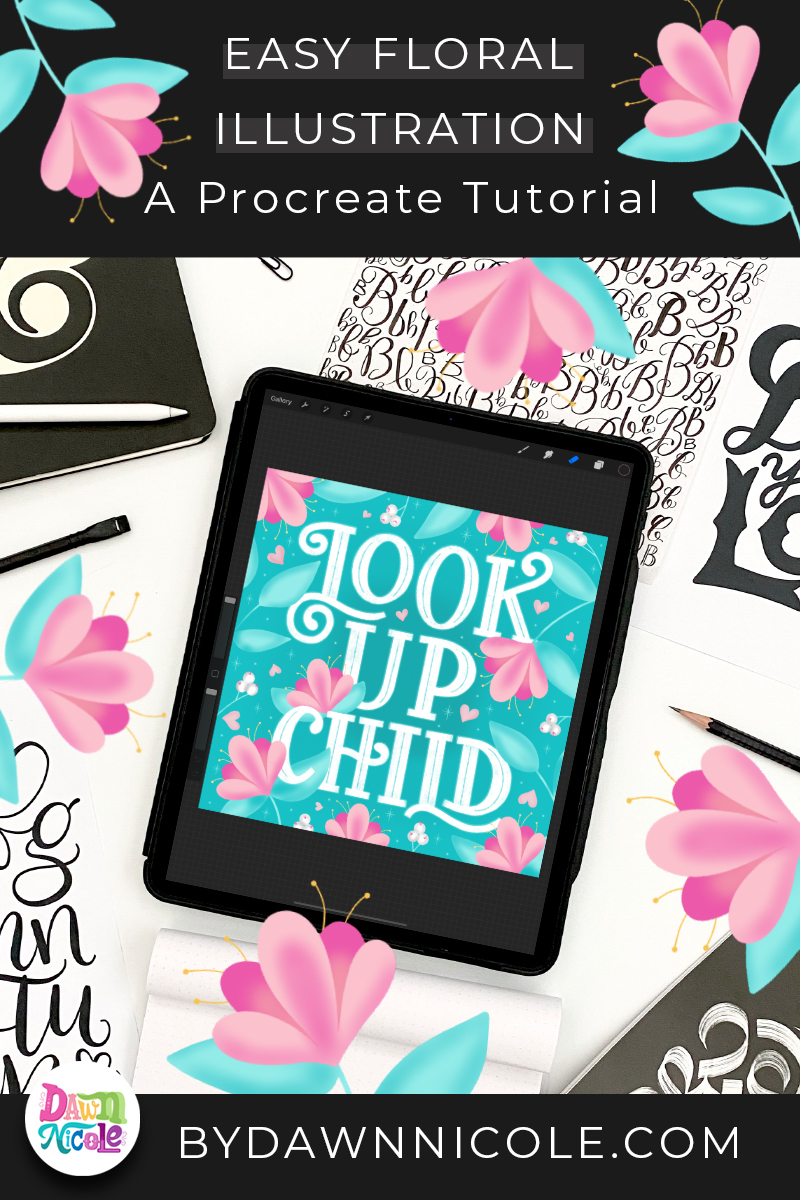
Easy Floral Procreate Illustration Tutorial (written + video)! Learn how to create this easy flower drawing in Procreate in just a few steps.
Easy Floral Procreate Illustration Tutorial
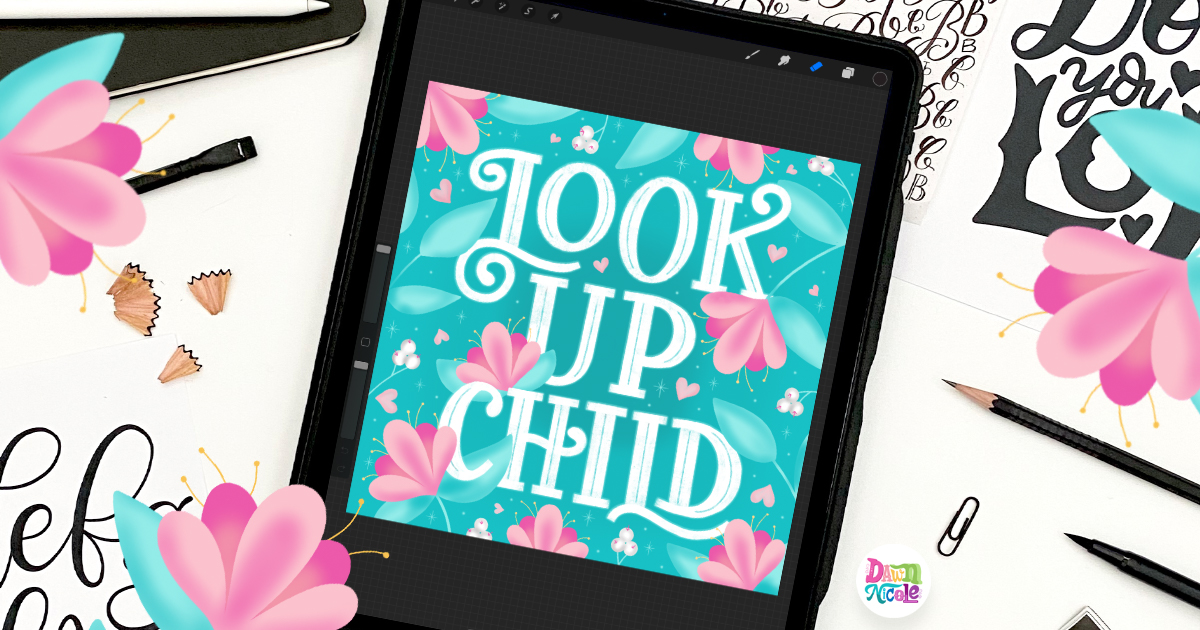
I recently created this “Look up child” piece as part of the 2020 Lettering Challenge I’m hosting this year. While the floral elements that surround my lettering may look intricate, they’re actually super duper easy to create.
Learn how to create your own version in this blog post!
I’ll show you in a short video lesson because I think that’s the best way to walk you through the steps, but I’ve also included a step-by-step written tutorial after the video.
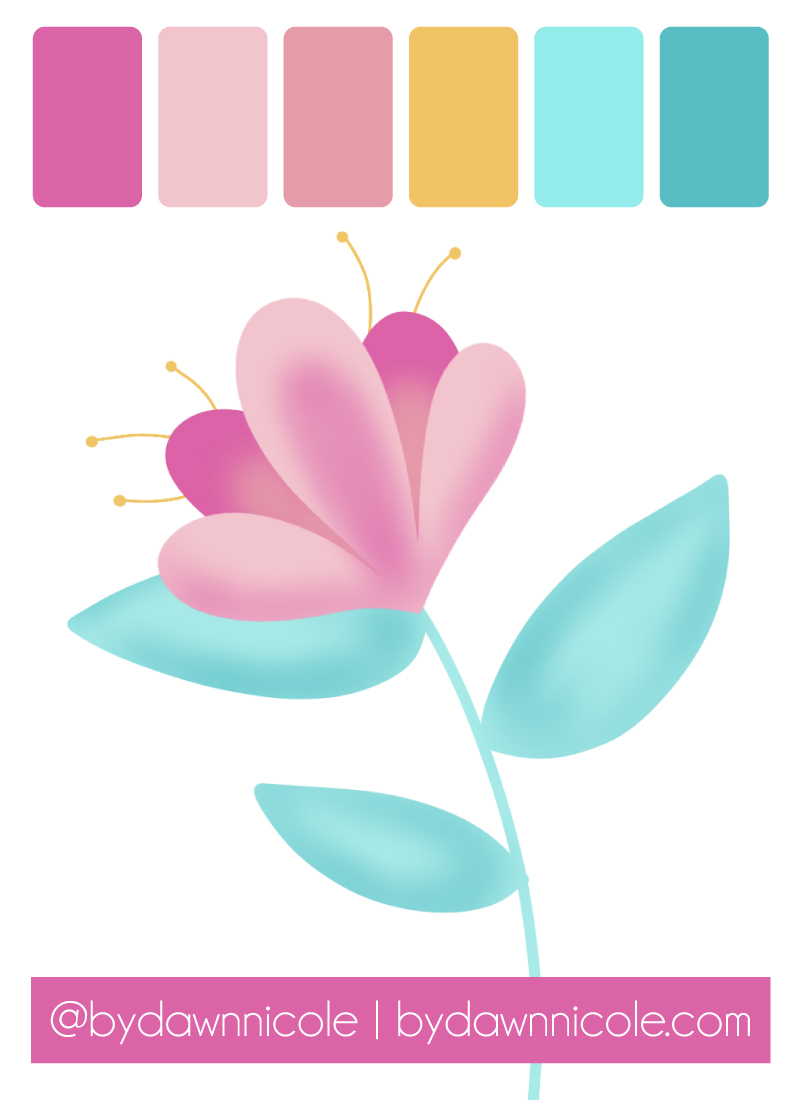
Below is the color palette I used. Feel free to download it (below) or use your own color scheme for your florals.
Here’s What You’ll Need for this Video Lesson
- iPad with Apple Pencil Capabilities
- Procreate App
- Procreate Brushes
- Monoline Brush
- Gradient Brush
- Color Palette. Download with the button below.
Download the free color palette→
Shop my Procreate Brush Sets →
Floral Procreate Illustration Video
In this 9-minute video, I’ll walk you through creating this flower drawing step-by-step.
Watch the video below!
Floral Procreate Illustration WRITTEN TUTORIAL
The written version makes it seem a bit more complicated than it is because of all the screenshots, so if the below confuses you, be sure to watch the video lesson.
Ready? Let’s get started!
Step One
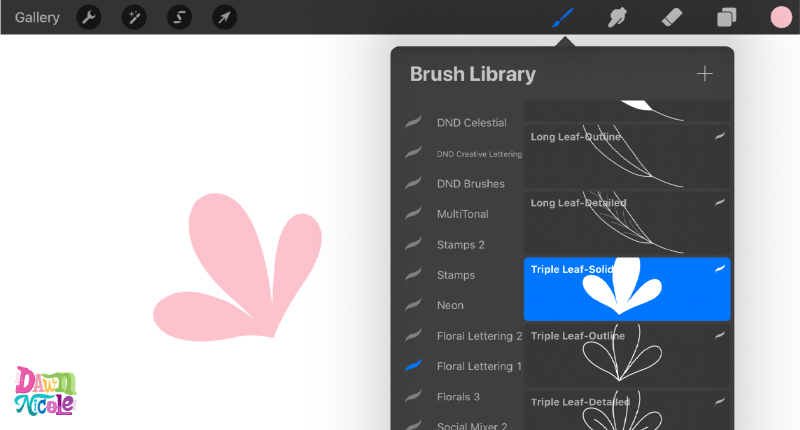
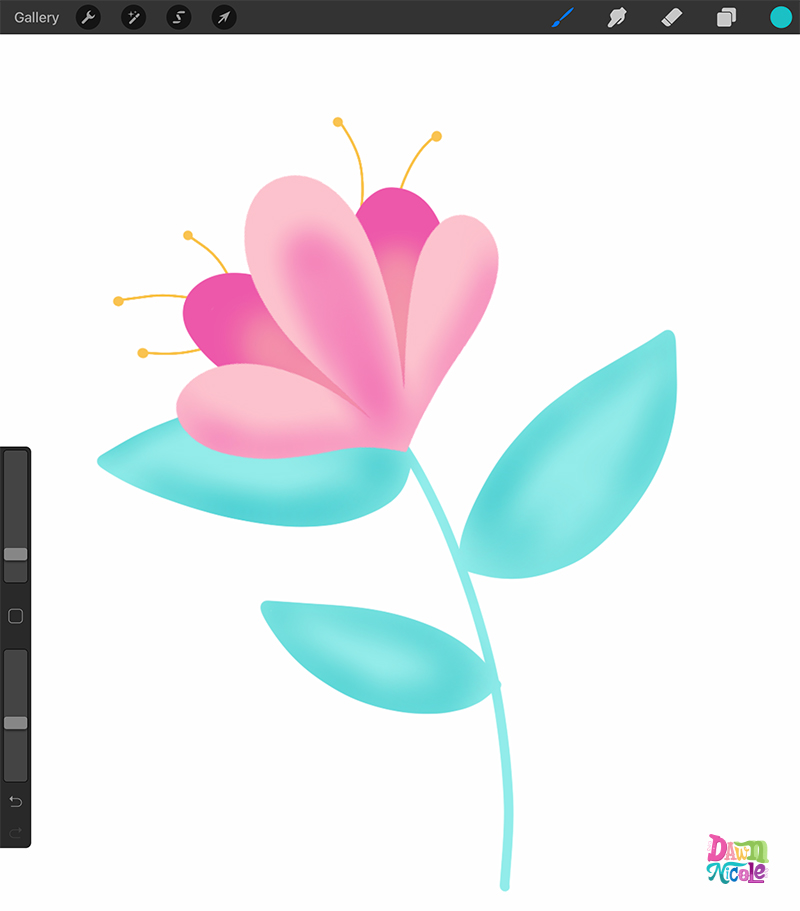
Use a monoline brush and the light peach color to stamp or draw this shape onto Layer 1.
I used the Triple Leaf Solid Stamp from my Floral Lettering Procreate Brush Kit.
To keep things organized, rename the layer Floral One.
Step Two
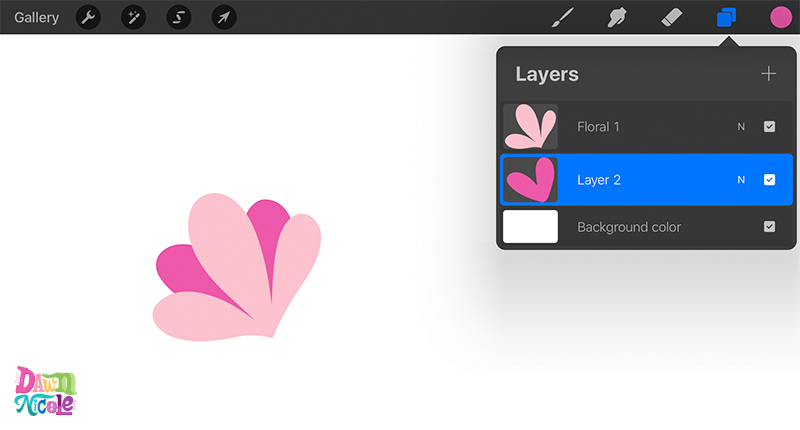
From the layers panel, click the + sign to add a new layer. Hold and drag that layer to the bottom as shown above.
Use a monoline brush and the hot pink color to draw a heart that forms the back petals.
Rename Layer 2 as Floral 2.
Step Three
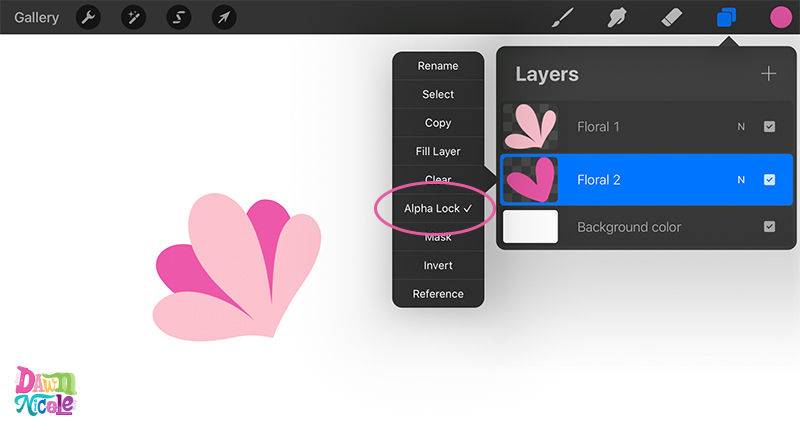
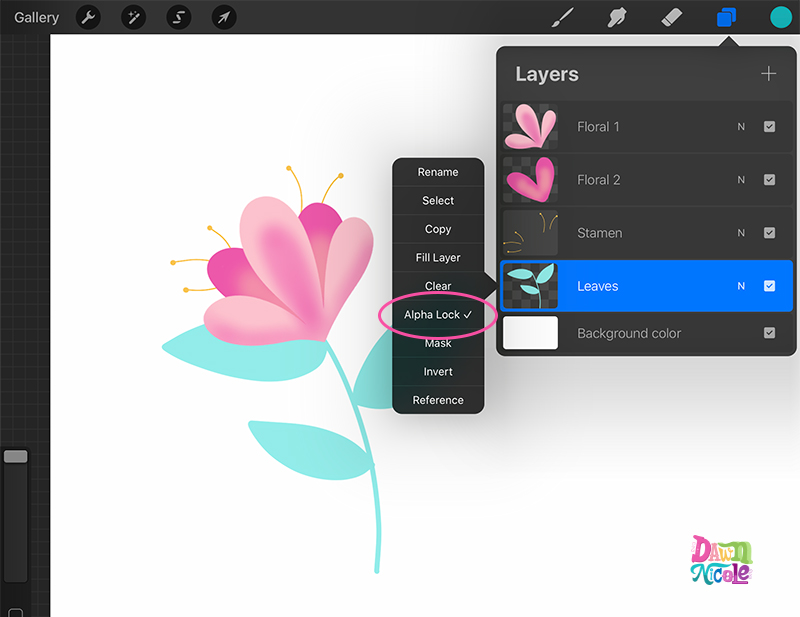
Turn on Alpha Lock on both floral layers. You can do this one of two ways:
- Tap the layer and click Alpha Lock as shown in the above screenshot.
- Swipe right on the layer with two fingers.
Step Four
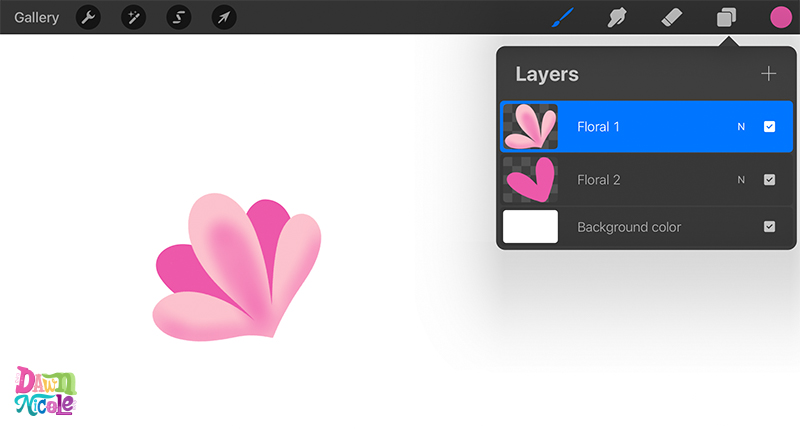
Using a gradient brush and the hot pink color to add dimension to Floral 1, as shown above and in the video.
I used the gradient brush from my Creative Lettering Procreate Bundle.
Step Five
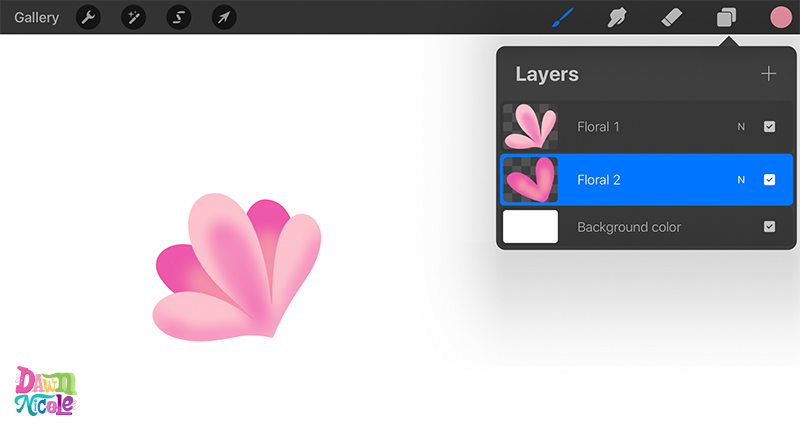
Repeat on Floral 2, using a gradient brush and the dark peach color to add dimension to the petal centers, as shown above and in the video.
Step Six
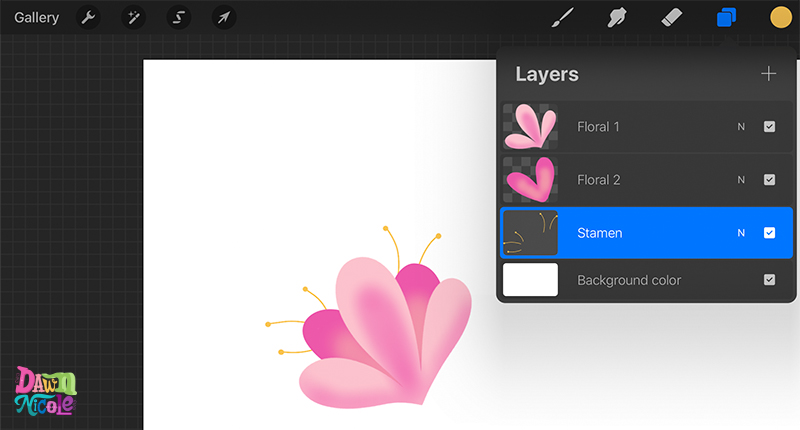
On a third layer, use a monoline brush and the yellow color to freehand some stamen.
Step Seven
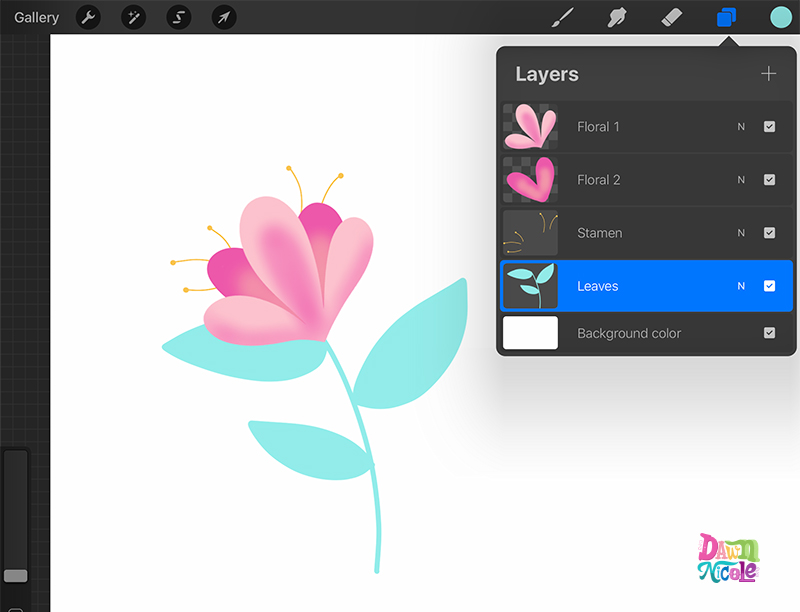
On a fourth (and final) layer, use a monoline brush and the light teal color to draw a stem and a few leaves.
Step Eight
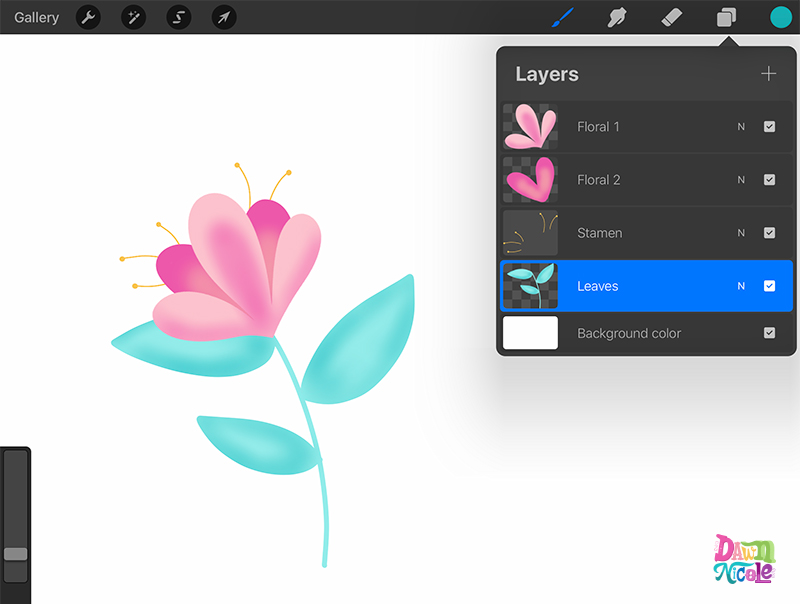
Turn on Alpha Lock on your leaves layer (shown above). Use a gradient brush and the dark teal color to add dimension, just as we did with the petals (shown below).
Floral Procreate Illustration: Optional Step
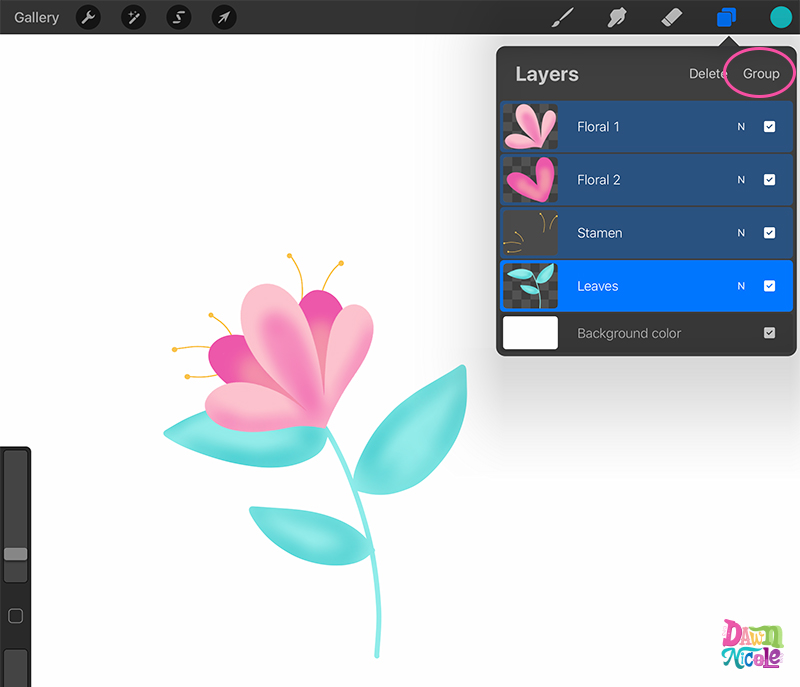
In the video, I showed you how to group the layers so you can move the entire floral element into one piece without merging all four layers.
To do this, you must select all four layers by swiping right on each layer with one finger or your apple pencil. Once all the layers are selected, click Group.
Rename the Group as Floral Illustration.
That’s it!
In the video tutorial, I discussed how I used the florals, leaves, berries, and more to add more character to my lettering piece, so again, be sure to watch it for a more in-depth discussion of using Easy Floral Procreate Illustrations to enhance your lettering work.
Share your work
I’d love to see what you create using this tutorial. Share your work on Instagram and tag me at @bydawnnicole on IG.
Happy creating!
LET’S CONNECT
Facebook // Pinterest // Instagram // Shop
