Learn how to create an easy Cherry Blossom drawing in Procreate with 4 beginner-friendly styles: basic, folksy, cutesy, and stained glass.
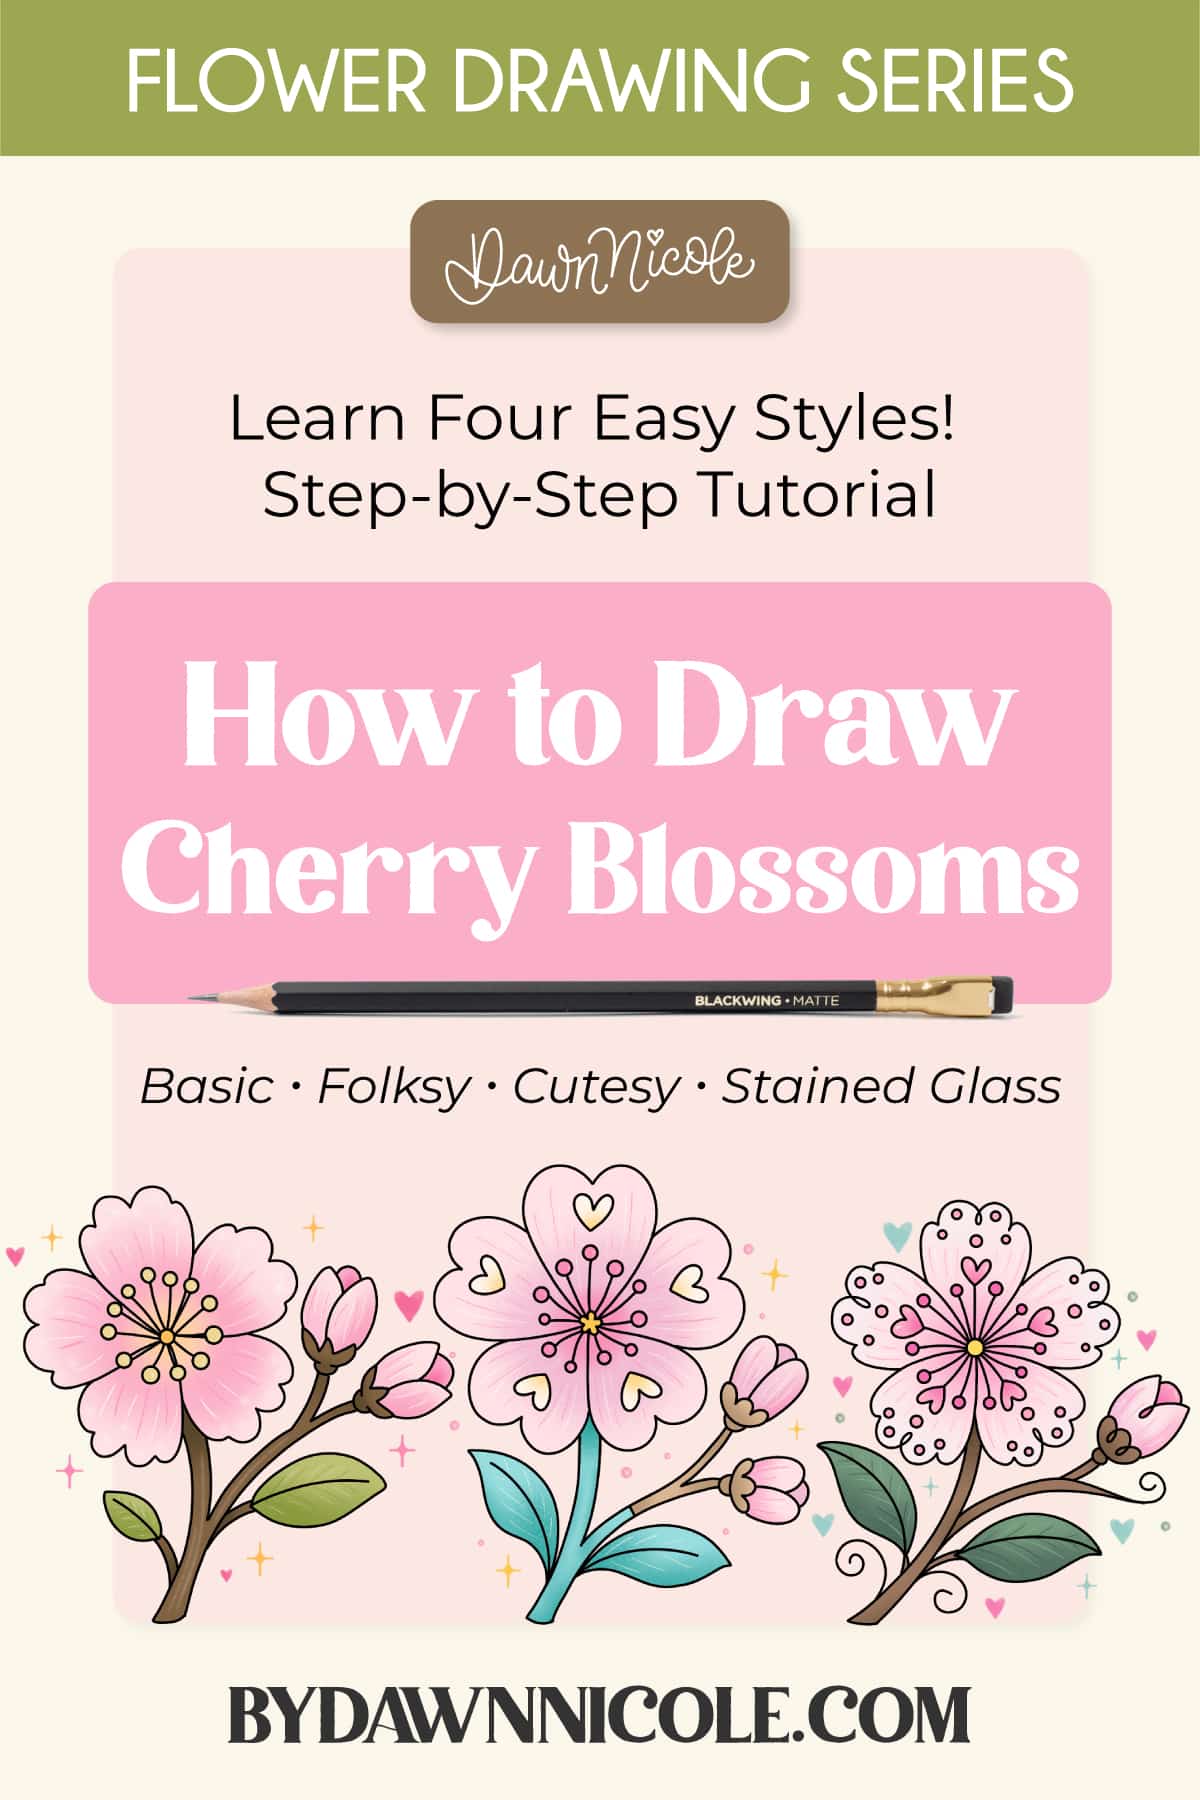
Easy Cherry Blossom Drawing Tutorial (4 Beginner-Friendly Styles)
Welcome to the sixth flower-drawing tutorial in my series. You’ll learn how to draw cherry blossoms with four fun and easy step-by-step drawing tutorials!
Cherry blossoms are loved for their delicate five-petal flowers and graceful branches, making them a beautiful subject for beginners and experienced artists alike. In this tutorial, I’ll show you how to create a Basic, Cutesy, Folksy, and Stained Glass Cherry Blossom.
Grab your favorite drawing supplies or open up Procreate, and let’s draw these iconic spring blooms!
What You’ll Need
Anything you can draw with! While I did these on my iPad in the Procreate App, you can follow along with traditional supplies as well. You can check out my favorite digital and physical art supplies on my Amazon page!
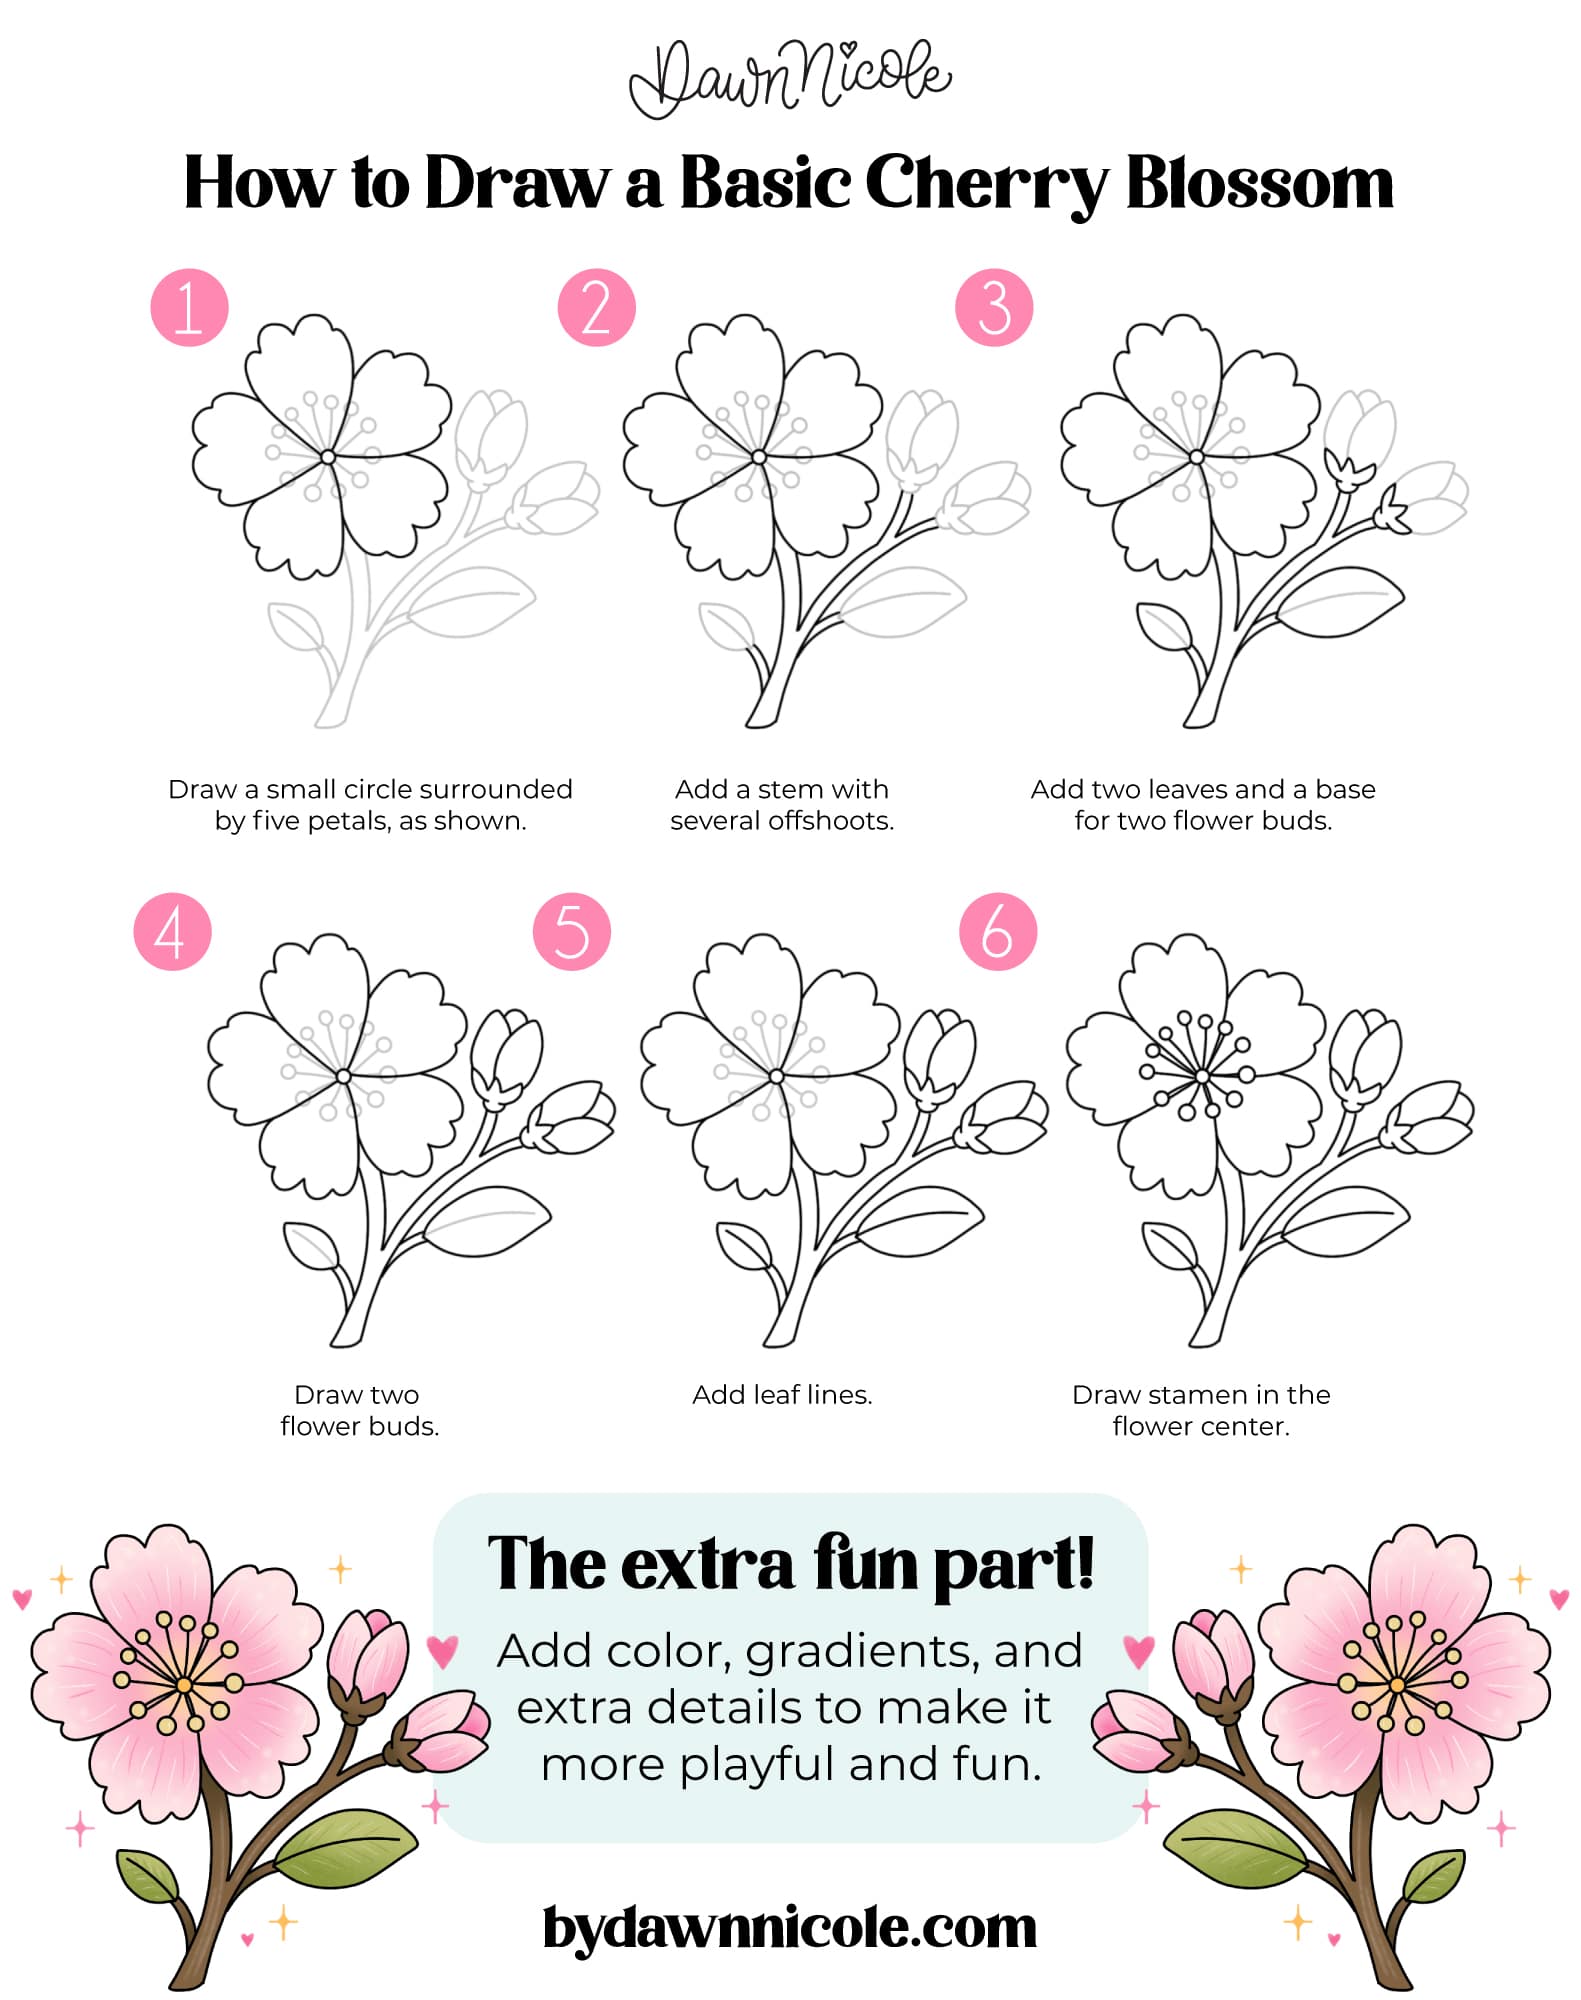
Easy BASIC Cherry Blossom Drawing
Cherry Blossoms are so adorable, and they’re fairly simple to draw.
If this is your favorite style, check out my Enchanted Botanicals Stamp Kit for Procreate.
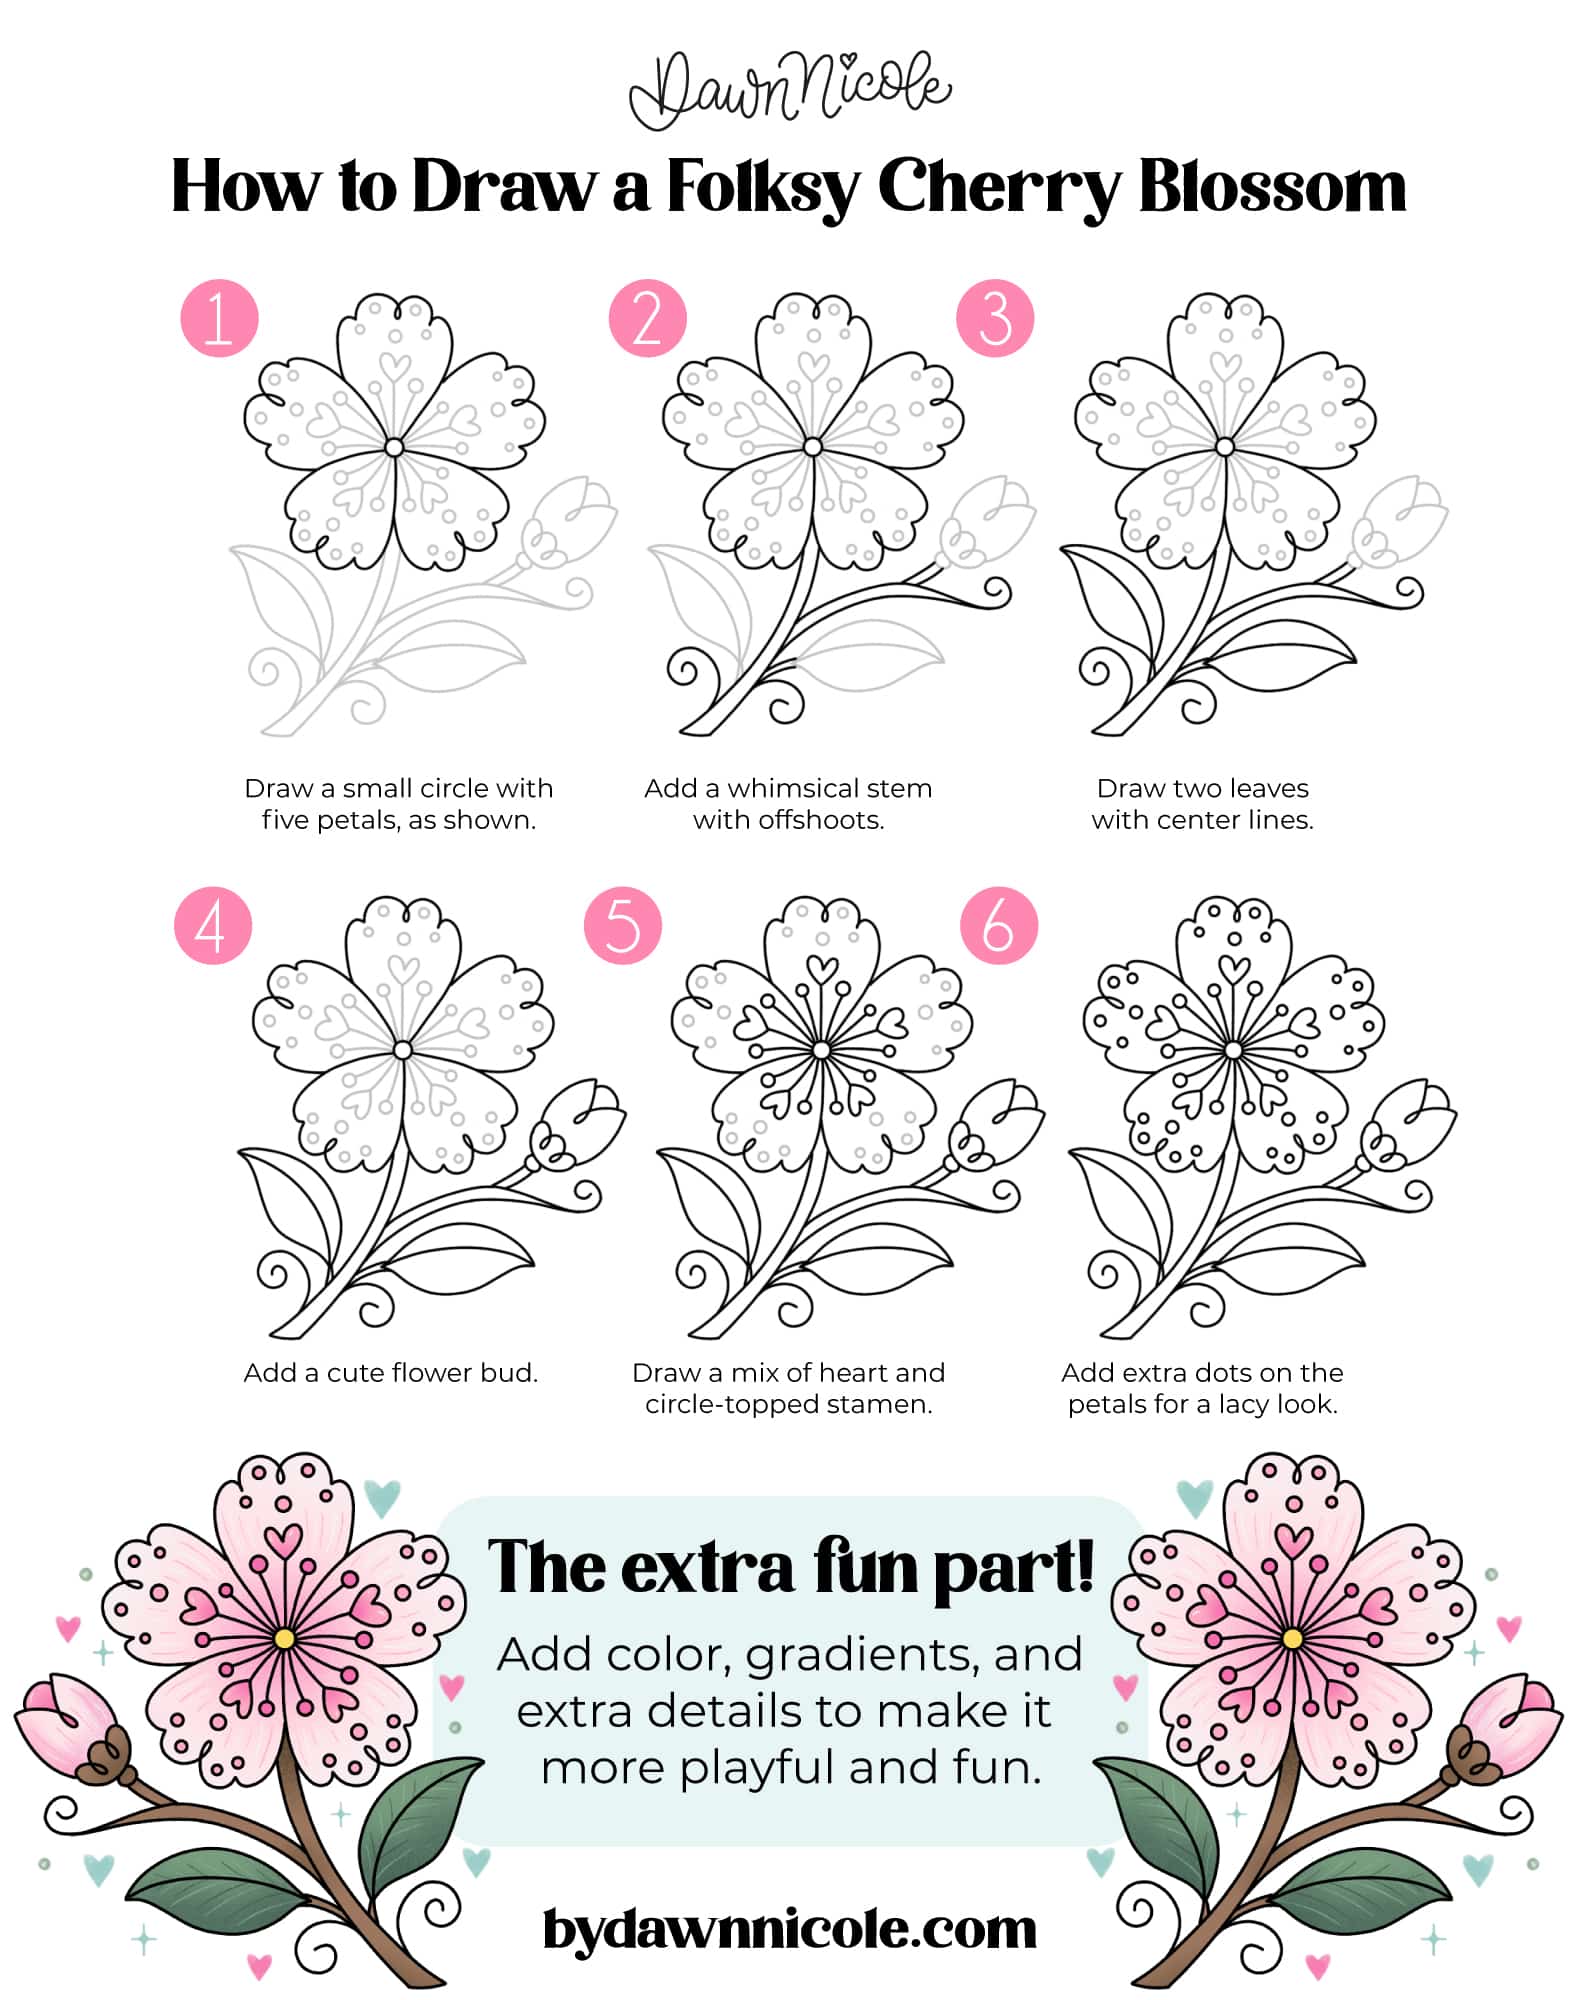
Easy Folksy CHERRY BLOSSOM Drawing
Folksy florals are one of my favorite ways to create whimsical, beginner-friendly artwork. Don’t be afraid to try non-traditional colors. They add to the whimsy and playfulness!
If you love this style, check out my Modern Folk Art Stamp Kit for Procreate.
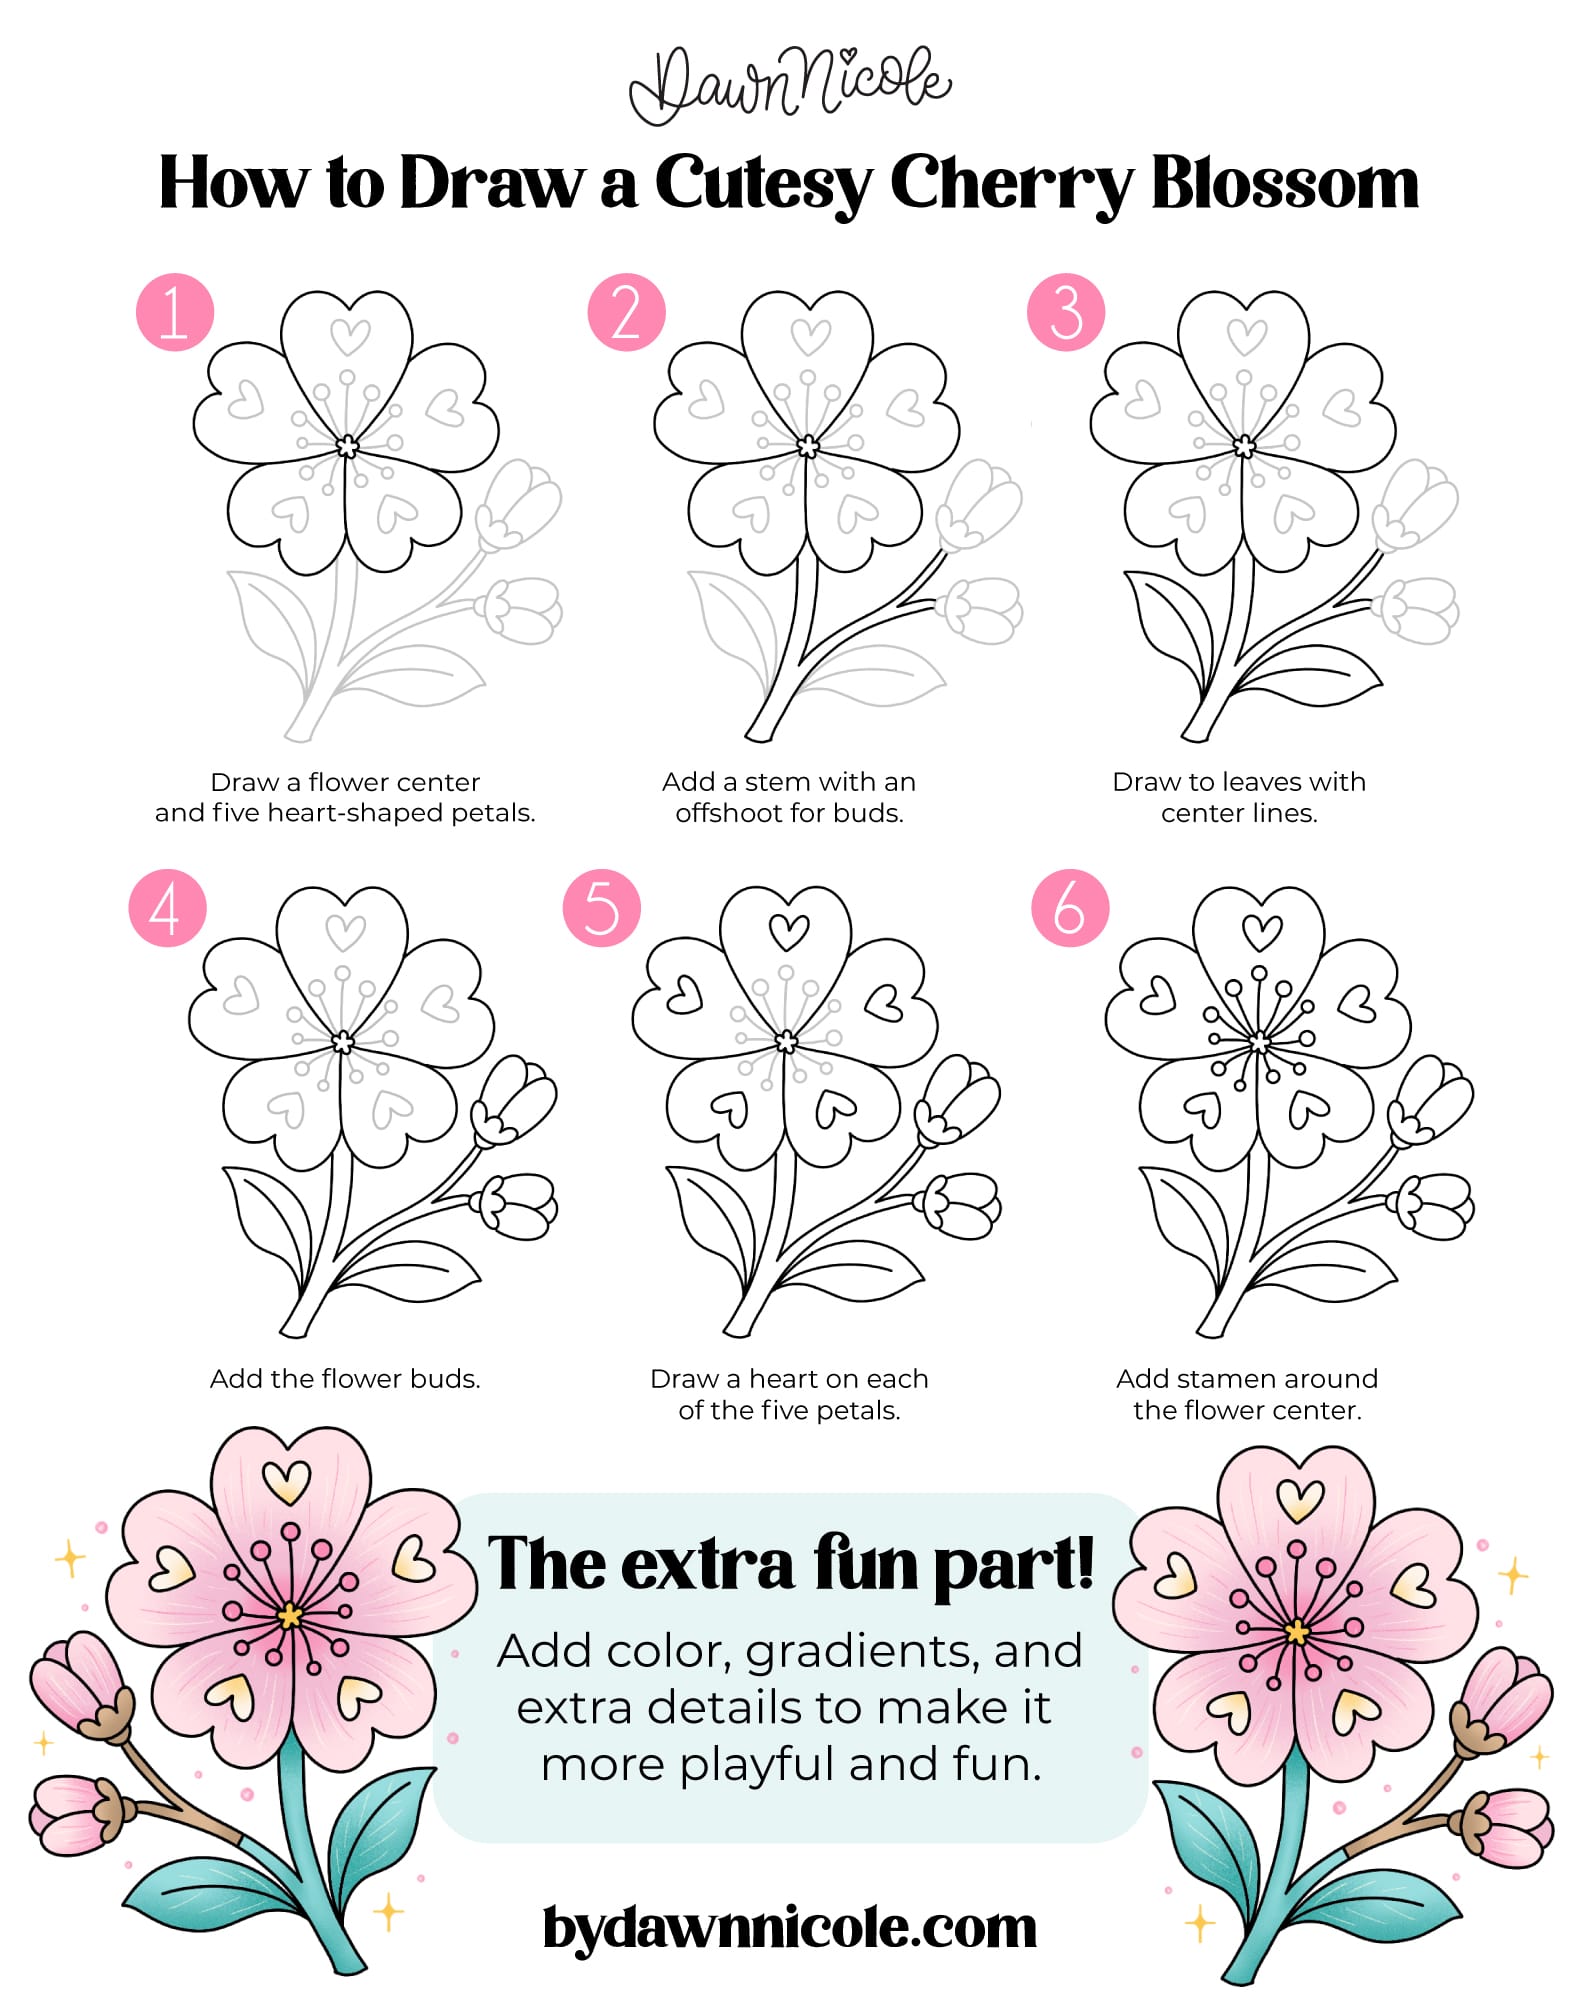
Easy CUTESY Cherry Blossom Drawing
Looking for a cherry blossom that’s a bit more artsy than realistic? This cutesy one may be just the thing!
If you love this one, check out my Super Cute Stamp Kit for Procreate.
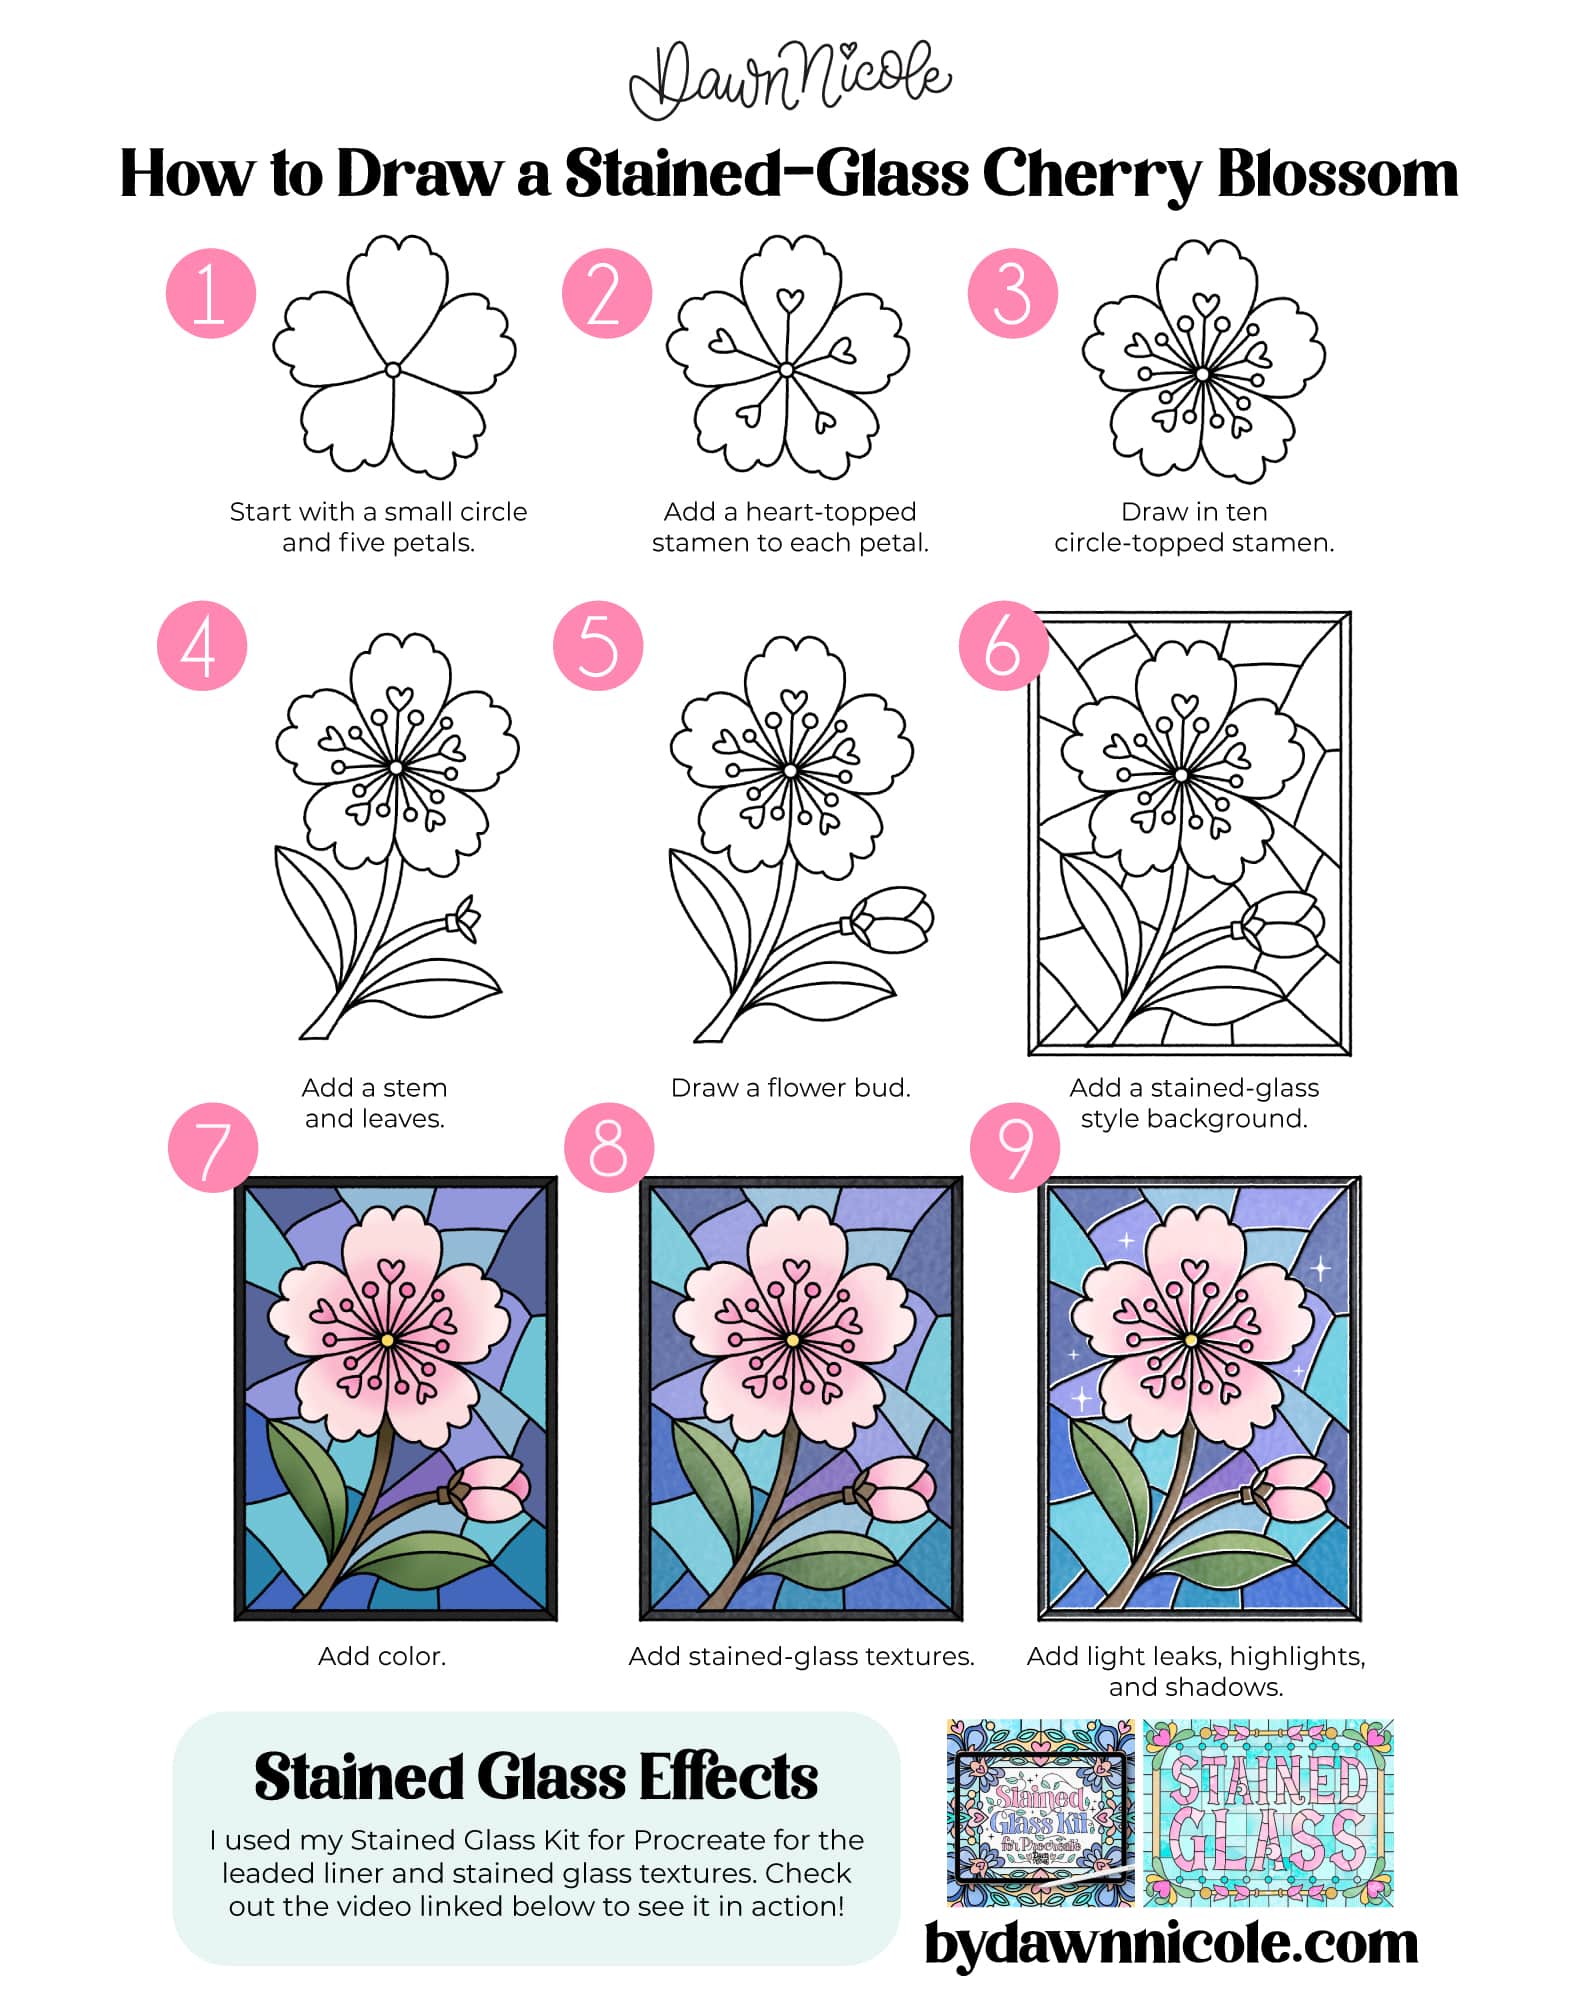
Easy Stained Glass Cherry Blossom Drawing
Let’s level up a bit and draw a stained-glass-inspired cherry blossom. I created this using my Stained Glass Kit for Procreate. Want a video tutorial? Watch a free lesson on how I create Stained Glass Art in Procreate.
Stained Glass Video Tutorial
Tips for Drawing Cherry Blossoms
Cherry blossoms are known for their delicate petals, soft colors, and graceful branches. Even though they look intricate, they’re easy to draw when you start with a few simple shapes.
- Start with five petals. Most cherry blossoms have five rounded petals arranged around a small center. Don’t worry about making them perfectly symmetrical. Slight variations make them look more natural.
- Add a little notch to each petal. One of the signature features of a cherry blossom is the small notches at the tip of each petal. This simple detail instantly makes your flower more recognizable.
- Keep the center small. Draw a tiny circle in the middle and add a few short stamens with little dots or ovals at the ends for a delicate finishing touch.
Overlap a few flowers. Cherry blossoms usually grow in clusters rather than by themselves. Drawing a few overlapping blooms creates a fuller, more realistic branch. - Use graceful branches. The branches should be slender with gentle curves. Let the flowers become the focal point while the branches quietly support the composition.
- Experiment with soft color palettes. Cherry blossoms are most commonly pale pink, blush, white, and soft peach, but you can also create playful versions with lavender, coral, or even rainbow gradients.
- Add subtle details. A few light lines radiating from the center, tiny buds, or small leaves can add depth without making the drawing feel busy.
- Have fun with your own style. Try adding hearts, sparkles, decorative line work, folksy flourishes, or stained-glass sections to transform a simple blossom into a unique piece of art.
With just a handful of rounded petals and a few thoughtful details, you can create beautiful cherry blossoms in everything from realistic botanical illustrations to cute, whimsical spring designs.
Easy Cherry Blossom Drawing FAQs
How do you draw a simple cherry blossom for beginners?
To draw a simple cherry blossom, start with a small circle for the center of the flower. Next, draw five rounded petals around the circle, adding a tiny notch at the tip of each petal to create the classic cherry blossom shape. Add a few short stamens with small dots at the ends, then finish with a thin branch or stem. Once you’ve mastered the basic flower, try drawing several blossoms together to create a beautiful spring branch.
What is the easiest flower to draw?
Daisies are often considered one of the easiest flowers to draw because they use simple shapes and don’t require complicated layering. Their straightforward structure makes them perfect for beginners.
Can I draw cherry blossoms in Procreate as a beginner?
Absolutely! Procreate is a great tool for beginner flower drawings. You can use layers to sketch, ink, color, and experiment with different styles while easily correcting mistakes along the way.
What brushes work best for drawing cherry blossoms in Procreate?
The best brush depends on the style you’re creating. Monoline brushes are great for clean outlines, watercolor brushes create soft painted effects, and textured brushes can add extra personality to your tulip illustrations.
How do I make my drawing look more realistic?
To create a more realistic flower, vary the size and direction of your petals, add subtle shading, and include overlapping petals. Small details in the flower center can also help add depth and dimension.
What colors can cherry blossoms be?
Cherry blossoms are most commonly soft shades of pink and white, but they can also bloom in deeper pinks, blush, cream, and pale peach. Some varieties open as a rich pink and gradually fade to nearly white as the flowers mature.
While blue, purple, and bright rainbow cherry blossoms don’t occur naturally, they’re fun color choices for whimsical illustrations. Whether you prefer realistic spring pastels or playful, colorful designs, cherry blossoms are perfect for experimenting with soft gradients and delicate shading.
Why do my petals look uneven?
Uneven petals are completely normal and often make your flower look more natural. Real flowers aren’t perfectly symmetrical, so slight variations can actually improve the overall appearance of your drawing.
How can I make my flower drawing more decorative?
Try adding patterned petals, playful doodles, decorative centers, hearts, dots, leaves, or folk art-inspired details. Drawing the same flower in different styles is a fun way to develop your creativity and illustration skills.
What can I do with my finished drawings?
Finished illustrations can be used for greeting cards, stickers, digital planners, social media graphics, wall art, scrapbooking projects, or personal creative practice. They’re also perfect for creating repeating floral patterns.
What flowers should I draw after learning cherry blossoms?
Once you’ve mastered these, try drawing other beginner-friendly flowers like roses, daisies, sunflowers, tulips, lilies, and lavender. Each flower teaches different techniques while helping you build confidence as an artist. I’ll be sharing tutorials for all of these over the coming months as part of my “Flower Fridays” series.


Learn the art of playful lettering with me
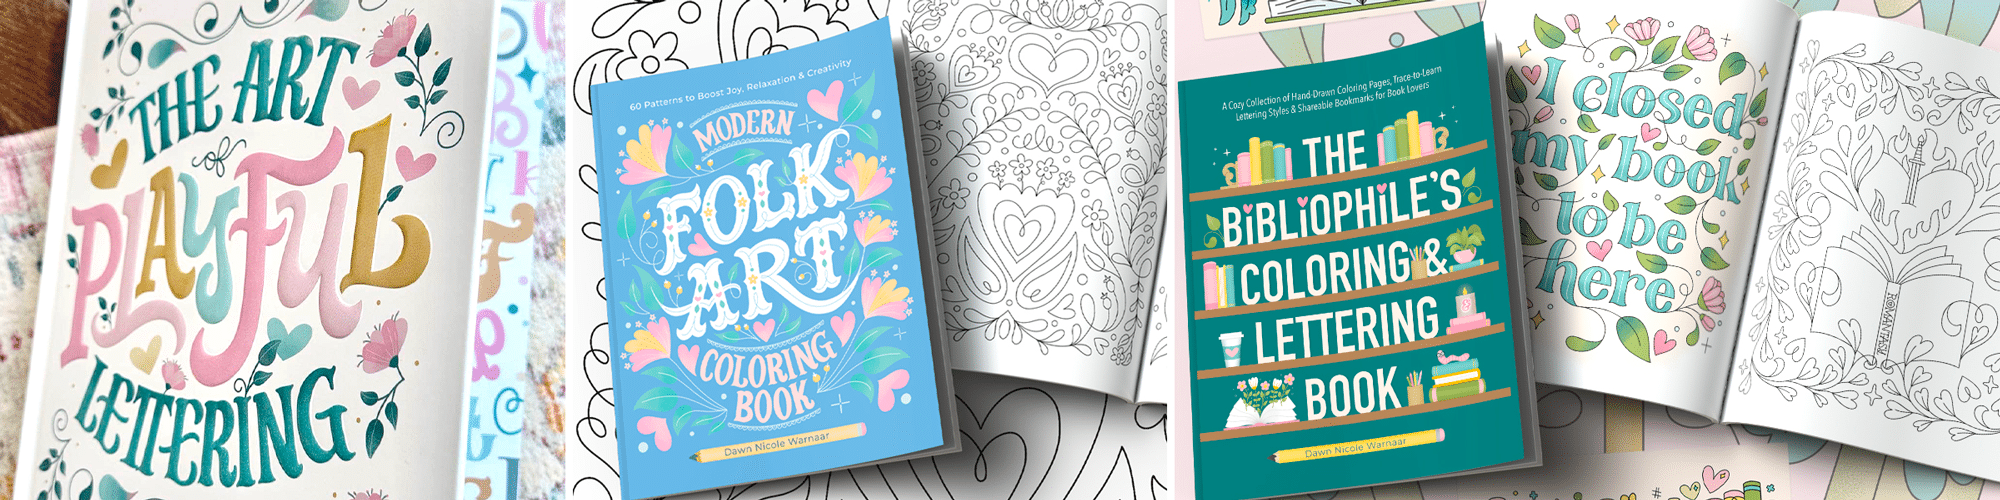
- Grab a copy of my book, The Art of Playful Lettering, on Amazon. Some of the info and artwork in this blog post were created for this book. That section of the book also contains color palettes to inspire your lettering creations!
- Check out the Procreate Brush Sets and Online Classes in my lettering shop.
- Pre-order my Modern Folk Art Coloring Book to relax and color my hand-drawn designs.
- Check out my 2025 Playful Lettering Style Challenge.

From the lettering Shop
Check out my five-star-rated Procreate Brush Sets, Classes, & Lettering Style Workbooks!
I hope you enjoy this Cherry Blossom Drawing Guide and Tutorial!
Happy creating!